Traditional Hand Finishing Skills – Polishing countersinks with a bow and a pulley – Maximin Chapuis

Traditional Hand Finishing Skills – Polishing countersinks with a bow and a pulley – Maximin Chapuis

  • Post category:General

This is the first in a series of six articles, by Maximin Chapuis, a French watchmaker, which takes a look at traditional finishing skills, which are all carried out by hand.

Hand finishing is very important work. Not only can it make the movement more attractive but it is also a way for the individual watchmaker to show customers the amount of time and care they have put into making the mechanism.

 In high horology, all hand finishing process have a functional aspect, for example, polishing protects the material from oxidation. As many fine timepieces have decorated hidden components, I think the goal is to try out different hand finishing methods to marry both the functional and the decorative aspect.

Circular graining, black polish, bevelling and polished countersinks, for example, give the mechanism an incredible ornamental look and, depending on countries, regions and cities of origin, all hand finishing signatures are different – it can be really interesting to solve the provenance.

My first hand finishing process, which I will describe here, is how to polish countersinks with a bow and a pulley. I discovered this ancient technique when I was studying in the Vallée de Joux in the Swiss Jura mountains. While I was there, I saw many old timepieces, which were over a hundred years old and still well decorated and shining.

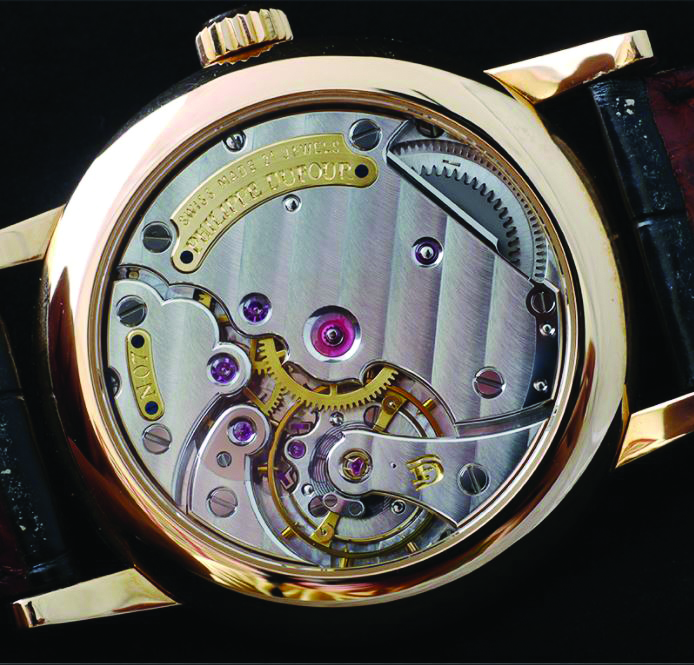
Specialist watchmakers from restoration workshops told me it is thanks to the ‘old knowledge from the valley’ which has been passed on through generations at the bench. At this time, rubies were riveted in bridges and they had a domed outer surface. Their colour was a profound red and the polished countersinks around the stone gave them a spectacular light appearance, see Figure 1.

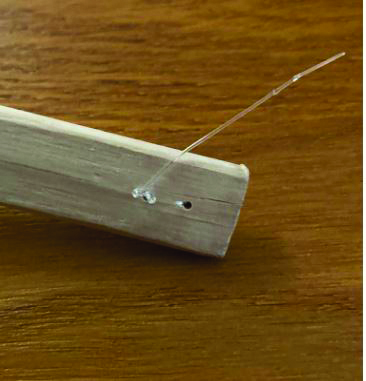
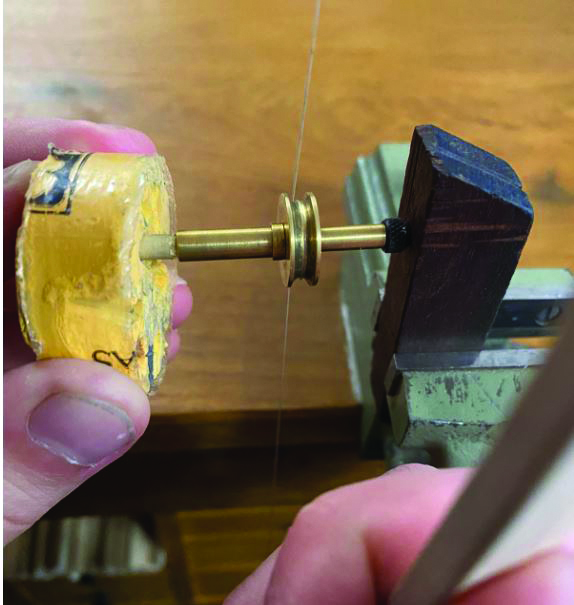
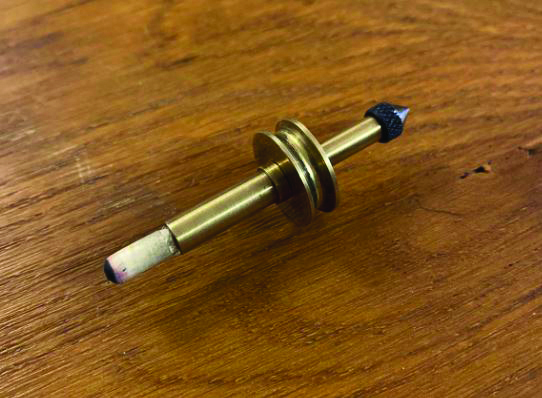
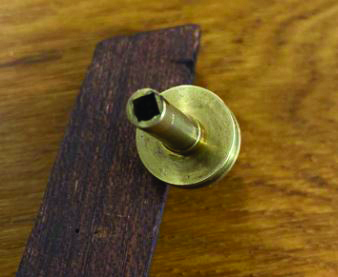
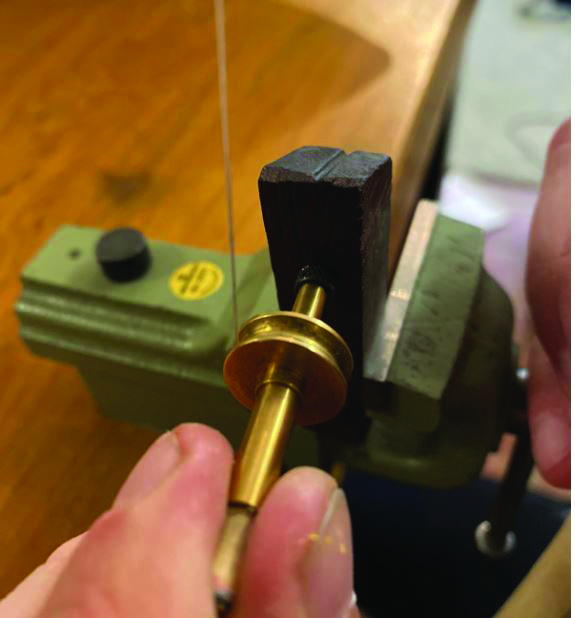
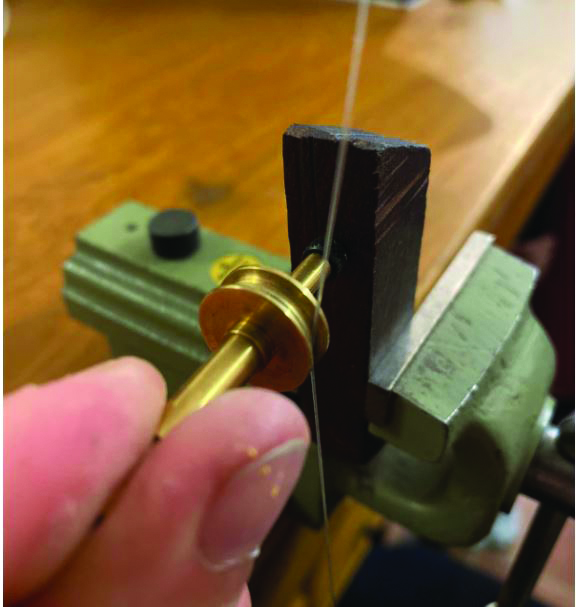
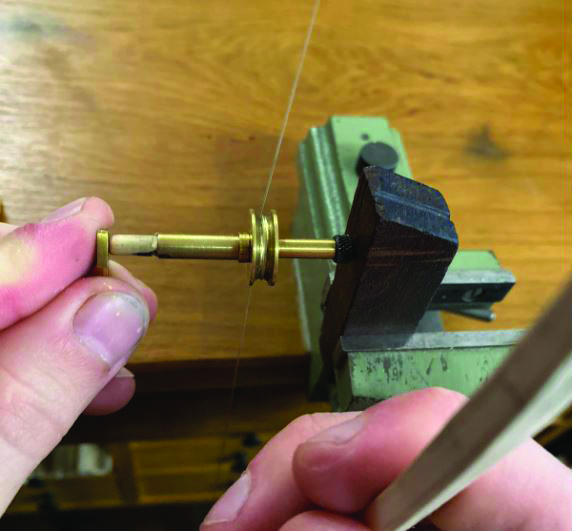
But how does it work and which tools are required?  You need a few things the get started; a vice with a block of wood, pulley with its shaped wood at the end and a bow with its nylon line.

1. Philippe Dufour with polished countersinks around the rubies.
4. Drilled holes at each end of the bow to fix the nylon line.
6. Applying polishing paste.

How does it work? The fast rotation of the pulley between the wood in the vice and the countersunk component. The bow string has to be wound around the pulley and positioned in front of the rotating tool (not at the back), Figure 5. Choose the appropriate polishing paste depending on the material to be polished (blue, red, yellow orange rods or diamond paste –

recommended for titanium components). Apply a small amount of polishing paste to the outer end of the wooden rod, whose shape must perfectly match the countersink.

The rounded shape of the wood is turned on a lathe with a chisel or with a perfectly clean file. To apply the paste, replace the component to be polished by the polishing paste rod,

Figure 6, and activate the polishing tool using the bow and pressing the paste onto the boxwood end.

Once the paste is applied to the end of the wood, place it in the countersink and then start the alternating rotation with the bow. A strong pressure and a steady motion are required. While rotating the polishing tool with the right hand, the left hand holds the component being polished following an orbital movement. Be careful, as this orbital movement can cause the steel point at the back of the tool to slip from the conical hole in the wooden block. The component to be decorated, will be damaged if the end of the wood slips from the countersink, with the pulley falling on the floor.

Three important conditions to make this process a success are: speed, pressure and movement. If these are met while the bow rotates the wood in the pulley, the part should heat up, which in turn will allow you to obtain the desired polish. The elbow has to remain still, all the rotational speed of the pulley is made with a fast alternating movement of the wrist only.

The pulley, Figure 2, is made in three parts: the central cylinder with a square broached at the end, Figure 3,  the pulley and the conical tempered steel point. It has to be as light as possible. The central cylinder and the pulley are made in brass and the conical extremity, screwed at the end of the cylinder, in tempered steel. To make sure it will not slip from the wooden block the conical end of the pulley should have a 60 degree angle.The wood at the end of the pulley fits snugly in the square of the central cylinder thanks to filing a tapered square with a length of 2.5 times its original diameter.

Which material should I use? This depends on the material of the component with a countersink. If it is brass or nickel silver, the most common is pegwood or boxwood. To make polished countersinks on a titanium bridge, it’s really better to use ebony. The shape of the countersink is made with a wheel countersink (‘Cutter consisting of a small sharp-edged disc that can turn at the end of a shank’ def. Berner p413). The lower level of the countersink has to be the same height as the extremity of the stone or the bevelling of the screw head.

What are the best materials and the right proportions for the bow? It needs to be both strong and flexible. Ancient watchmakers, one hundred years ago, were using material from the Baleen whale. Of course nowadays the species is rare and its sale is forbidden. A  very old umbrella is perhaps the only way to find it these days. The contemporary alternative is to use a wooden bow, made with a wood planer.

After many tests, the most functional and useful dimensions are 600 to 650mm long, 12 to 14mm wide and 4 to 5mm thick, made with a wood plane. Hazelwood is the best I found, offering both flexibility and robustness. In Figure 4, you can see  that I have just finished making the bow with two small drill hole at each end of the bow for the fishing string.

2. The pulley with boxwood end.
3. Square broach in the cylinder of the pulley.

5. The right way (pictured left) and the wrong way ( pictured right) of winding the string around the pulley.

7. Starting polishing the countersink of the bridge.

About the Author

French watchmaking student, Maximin Chapuis (25) is passionate about the conservation and restoration and the history of time measurement.

He grew  up in Besançon, a small city in east of France near the Swiss border, spending many happy hours at the Time Museum where his love of horology and decision to become a watchmaker was born.

After a Scientific baccalaureate, he studied for two years as a technician in micromechanics and microtechnics, working on spark erosion, CNC, precision moulding and, of course, the traditional ways to machine components with lathes, milling and drilling machines. His first six weeks

internship was as a method support technician at the Jaeger-LeCoultre technical office.

He left France to become a watchmaker in Switzerland’s Vallée de Joux, and, in parallel to two years at the bench, he worked evenings and holidays in Audemars Piguet’s technical office. He also lectured in history at horological museums.

He returned to France to take a Craft and Design National Diploma (BA), studying the restoration of clocks and pocket watches. At the same time he worked  in the Breguet boutique and museum in Paris, as a technical selling advisor and lecturer. Now in his seventh year of study and the final year of his diploma, he is  conducting a research project on Bonniksen’s Karrusel.