
I am a student on the BSOW traditional 3000 hour watchmaking course, class of 2018-2020, which entails the more traditional aspects of watchmaking, that aren’t as commonly taught these days.
Alongside six other students, I learn micro mechanics, hand turning winding stems and balance staffs, timing hairsprings using the Luthy tool, escapement setting and also gain a deeper understanding of escapements and chronographs.
During the course, we have the opportunity to work on two of the school’s watches. The first is an ETA 6498, which we are asked to modify, which I am writing about here.
The second is a WOSTEP W01, which we are asked to hand finish, this includes the bridges, turning and riveting a balance staff to a balance wheel, hand turning the winding stem and also timing and fitting the hairspring.
I wanted to describe my date modification on the ETA 6498 and why I chose this course of action:
This modification came about as an idea for my ‘project watch’. I thought it would be fitting as I would learn a few different processes while carrying out the work. I begin by taking a 6498 mainplate and plotted out where it would be viable to put the wheels, jumper and jumper spring. After some thought, I decided that I would have the date indication on the dial side at 12 o’clock.
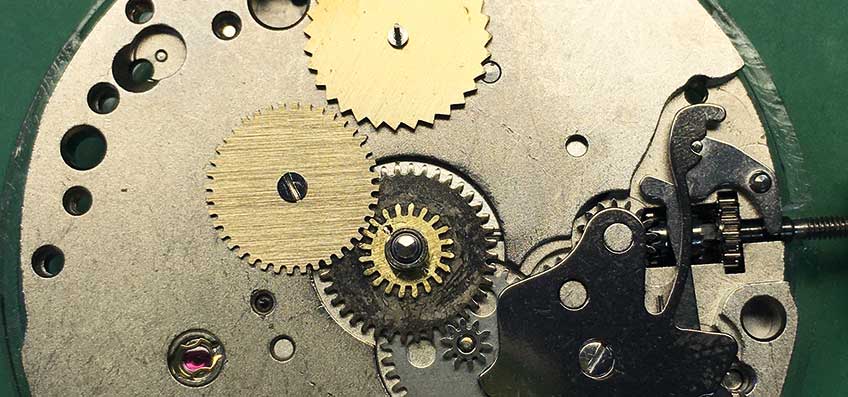
For a date indication using a hand on an arbour you will need to get drive so the end wheel will jump 1 tooth every 24 hours. To achieve this I cut a wheel using a Schaublin70, which is pinned onto the stock hour wheel, making a 24 hour drive. This in turn drives another hour wheel with the tube removed. This intermediate 24 hour wheel has had all but one of its teeth topped by 0.15mm, this allows all but one tooth to turn freely with no engagement with the 31 tooth starwheel, Figure 1 & 2.
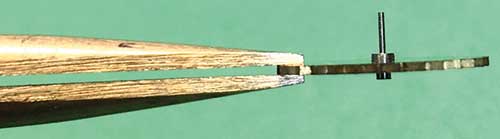
Figure 1.
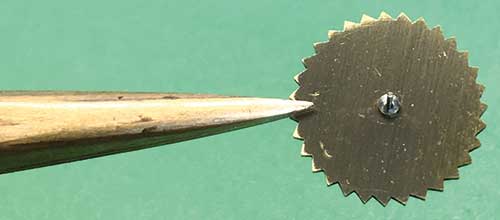
Figure 2.
The tooth which has not been topped will therefore engage with the star wheel and turn it so it jumps one tooth. This intermediate 24 hour wheel is mounted on an eccentric screw on the dial side of the mainspring so that the depth is controllable to ensure no butting on disengagement occurs. The last wheel is the 31 tooth star wheel. You may notice that it does not have the perfect tooth profile for a star wheel, more like a ratchet tooth. This is simply to allow the entry of the long tooth on the intermediate 24 hour wheel and aids the jump as the other side the tooth on the star wheel will touch with deeper engagement. Notice the longer tooth coming out of engagement with the central 24 hour wheel.
I also cut the 31 tooth star wheel using the Schaublin70 but using a different process. For this I turned the desired outer diameter, then used a parting off tool to get the wheel to the correct thickness that I wanted.
I then went on to cut the teeth, for which I mounted the milling attachment above the workpiece at a 45 degree angle, but slightly off centre, to give the desired ratchet tooth profile. Using the dividing head I cut 31 teeth. I had the problem of how to mount this wheel on the dial side of the mainplate. To overcome this, I turned an arbor to allow a hand to be fitted for the indication and drilled the mainplate to friction fit a jewel. I have also fitted a jewel onto my dial which allows me to control the endshake and ensure good division which will lead to no disengagement when it jumps at midnight.
You may recognise where the date jumper has come from – I used one from a 7751. I then adjusted a spring to get the desired tension from the jump. Figure 3 & 4.
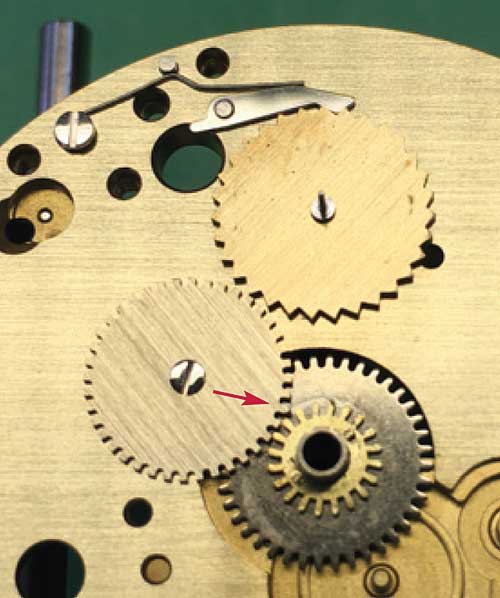
Figure 3.
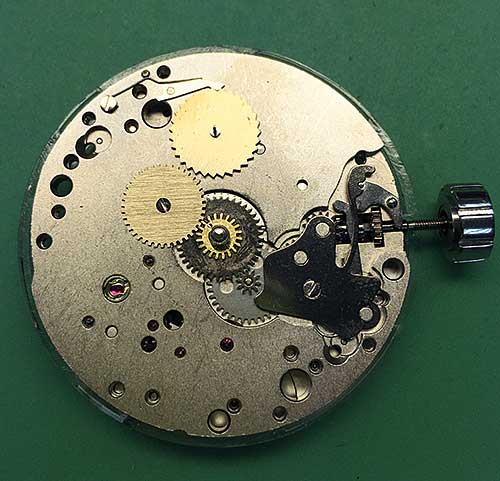
Figure 4.